Tuesday, December 10, 2013

Flower Guide: The Poinsettia


Poinsettia History

In order to fully understand or appreciate this plant, it is helpful to take a look at where did the poinsettia come from. The poinsettia is native to Central America, near southern Mexico. It was introduced to the U.S. in 1828 and got its name from Joel Roberts Poinsett. Poinsett was the first U.S. Ambassador to Mexico with a passion for botany. Upon discovering this shrub, he became so enchanted with its bright red blooms that he sent several plants back to his home in Greenville, S.C. in 1825 The poinsettia is not a poisonous plant. Research has proven that the poinsettia is not lethal to humans or pets unless eaten in extremely large amounts. However, your poinsettia and all other houseplants should be kept out of the reach of small children and pets, since varying degrees of discomfort may be experienced if plant parts are ingested. The poinsettia, a member of the Euphorbia family, and is the number 1 potted plant sold in the United States. And, that’s over a very small 6 week window! National Poinsettia Day is celebrated on December 12.
Taking Care of your Poinsettia

With proper care, your poinsettia will last through the holiday season and right into late winter. Play close attention to the following tips:
• Place in a room where there is bright natural light but not where the sun will shine directly on the plant.
• Keep the plant away from locations where it will receive hot or cold draughts.
• Place the plant high enough to be out of reach of unmonitored children and pets.
• Set the plant in a water-proof container to protect your furniture.
• Water the plant thoroughly when the soil surface is dry to the touch. Discard any excess water which remains in the saucer after 10 minutes.
• The bright color of the bracts will remain longer if temperatures do not exceed 22°C.

Re-flowering Your Poinsettia                                                                                                                                                                                                    If you cannot bear to throw your poinsettia out when it is finished providing color, you may want to try your hand at re-flowering your poinsettia next year.

December 
-Full bloom. 
-Water as needed. 
April 
-Color fades.
-Keep near sunny window and fertilize when new growth appears.
-Cut back stems to about 20 cm.
June
-Repot if necessary. 
-Fertilize with a balanced formula 20-20-20. 
-Continue to water when dry to touch. 
-Move outside if temperatures do not fall below 10°C. 
-Place in light shade.
Late August
-Take inside. 
-Cut stems back, leaving three or four leaves per shoot.
-Sunny window.
-Water and fertilize as needed.
Sept. 20 'til December 1
-Keep in light only from 8 a.m. to 5 p.m.
-Put in dark (NO LIGHTS) 5 p.m. to 8 a.m.
 

Remember the key to success: Follow the strict light/dark instructions carefully.

What Makes Poinsettias Turn Red?
Many people wonder what makes poinsettias turn red. It is actually the plant’s leaves that provide its color through a process called photoperiodism. This process, in response to certain amounts of light or lack thereof, turns the leaves from green to red (or pink, white, and other shade variations). What most people mistake as flowers in fact specialized leaves, or bracts. The small yellow flowers are found in the center of the leaf branches.
How to Make Poinsettia’s Turn Red
In order to get a poinsettia plant to turn red, you need to eliminate its light. Flower formation is actually triggered by periods of darkness. During the day, poinsettia plants require as much bright light as possible in order to absorb enough energy for color production. At night, however, poinsettia plants must not receive any light for at least 12 hours. Therefore, it may be necessary to place plants in a dark closet or cover with cardboard boxes.
Leaves
It’s important to pinpoint the possible cause in the event that your poinsettia plant leaves are falling off, as in some cases, this can be easily fixed. Environmental factors, such as warm, dry conditions, are most often the reason for leaf drop. Stress can also be a factor. Keep the plant in a cool, draft-free area and provide plenty of water. If all else fails, the plant may need to be discarded. Now that you know how to you take care of poinsettias you can keep these lovely plants year round. With proper poinsettia plant care, they will give you many years of beauty.


Poinsettia Facts

-Poinsettias are native to southern Mexico and Guatemala, where they are a perennial shrub that can grow as large as 10 feet tall.

-The Aztecs called the poinsettia Cuetlayochitl.
-Poinsettias are part of the Euphorbiaceae family. Many plants in this family ooze a milky sap.
-Most people think the showy colored leaves of the poinsettia are the flowers, but are actually colored bracts. The flowers or cyathia of the poinsettia are in the center of the colorful bracts.
-Poinsettias are not poisonous. However, it is not intended for human and animal consumption. 
-By an Act of Congress, December 12th was set aside as National Poinsettia Day. The date marks the death in 1851 of Joel Roberts Poinsett, who is credited with introducing the native Mexican plant to the United States.
-There are over 100 varieties of poinsettias available.
-Seventy-four percent of Americans still prefer red poinsettias.
-Poinsettias are the best selling potted plant in the United States.

Order a lovely Poinsettia plant today for your home or office!

Friday, December 6, 2013

Flower Guide: The Beautiful Amaryllis Flower


Amaryllis flower guide

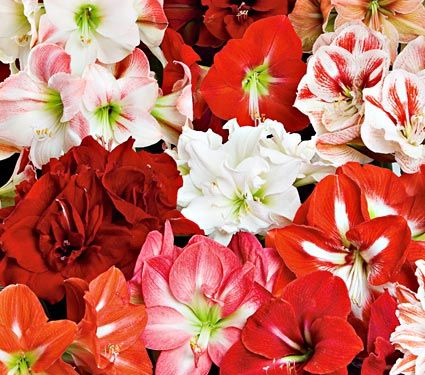
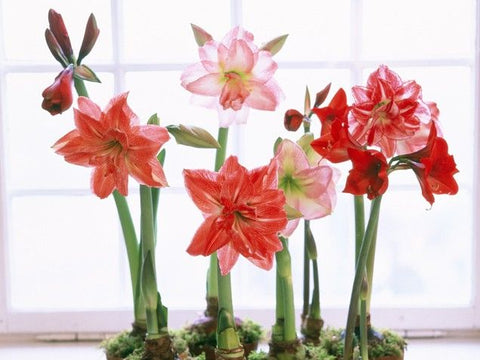
The Amaryllis or as it’s botanically known Hippeastrum is one of our favorite flowers to work with. It’s perfect for holiday arrangements and has become increasingly popular for holiday gift plants, undoubtedly because the bulbs bloom very freely indoors. The large, showy flowers make a bold statement and are available in an increasing variety of colors, shapes, and sizes that fit almost any taste. We’ve created this handy guide so you too can become an Amaryllis expert! 
Mythology- In Greek mythology, Amaryllis was a shepherdess who loved Alteo, a shepherd with Hercules' strength and Apollo's beauty. However, Alteo only loved flowers. He'd often said that he would only love a girl who bought him a new flower. So, Amaryllis dressed in maiden's white and appeared at Alteo's door for 30 nights, each time piercing her heart with a golden arrow. When Alteo finally opened his door, he found a crimson flower, sprung from the blood of Amaryllis's heart. The word "amaryllis" comes from the Greek word "amaryssein," which means "to sparkle," referring to the bloom. Today, the amaryllis symbolizes pride, determination and radiant beauty.
                                                                                                                                    
Features- Amaryllis has tall, thick stems and large, colorful flowers. Bloom colors includes red, pink, white, cream, orange and striped and variegated shades of several other colors.


Background- The amaryllis is native to South Africa, the Americas and parts of the Caribbean. It was discovered in Chile in 1828 by Eduard Frederich Poeppig, a physician and plant hunter from Leipzig, Germany.
Amaryllis Care
Planted Amaryllis-When its brilliant holiday blooms have faded, should you toss that big brown amaryllis bulb into the compost pile? No! Amaryllis, are as easy to care for as any house plant. When they're not blooming, the strap-like leaves make an attractive, architectural backdrop for other plants. With a little fertilizer and summer sun, your amaryllis will bloom again, bigger and better than ever! Treat your amaryllis as you would any houseplant, with regular water and fertilizer. Amaryllis plants like sun, the brighter the better, especially in winter. If you tuck it in a dim corner, it may survive, but more sun means better growth and better bloom next year.


How to re grow amaryllis plants


Here's an easy step-by-step plan to get your amaryllis to bloom again:

1. Keep it cool through the holidays.
Enjoy your amaryllis for the maximum time possible by placing it in a location with diffuse light and cool indoor temperatures in the 60°F range. Keep it barely moist. When you water, be careful not to get the portion of the bulb that sticks above the soil wet. If you have a large bulb, you may get two or three flowering stalks that bloom over a period of several weeks.

2. Cut the flower stalks.
When the last flower has faded on each of the flower stalks, cut the flower stalk near the top of the bulb. Be careful not to injure the leaves or any emerging flower stalks. Don't be alarmed if a large amount of sap runs out of the hollow flower stalk when you cut it. This is normal if the plant has been well watered.

3. Increase light, water, and fertilizer.
It's now late winter, and your amaryllis is now in its growth phase. Your main objective is to encourage leaf production that will help the bulb bulk up for next year's flowers. It's hard to give your amaryllis too much sunlight at this time of the year. Move it to the sunniest location that you can manage. A sunroom or greenhouse space is best, but a south-facing window will work until spring comes. Fertilize it monthly with a liquid fertilizer, and never allow the soil to dry out completely.

4. Move it outdoors in spring.
As soon as the weather settles and all threat of frost is gone, move your amaryllis outdoors. Don't be alarmed if many of the leaves wither and die in the adjustment period. Wind and exposure to more sunlight may cause some of the older leaves to die; new ones will grow. Choose a sunny area where you can water the plants daily. A deck or patio works fine, and the glossy strap-shaped leaves are a good textural foil for many other plants. Fertilize the plants every two weeks with a liquid fertilizer or apply a slow release fertilizer.

5. Decide when you'd like your amaryllis to bloom.
If you want flowers for the holidays, you'll need to begin its dormant period by mid August. Withhold water, and move the pots to a location where they can be kept around 55°F. Most people don't have a space that they can keep this cool at the height of summer, so you might have to let the seasons determine bloom time for you. You can leave your amaryllis outdoors well into autumn. If you do, stop fertilizing it in late September and bring it indoors before the end of October or earlier if a heavy frost is forecast. You can bring it indoors in the pot or remove the bulb from the pot and wash the soil off the roots if you like at this time.

6. Keep it in cool storage until the bulbs signal they are ready to go.
Amaryllis usually lose all or most of their leaves during their dormant period, although it is not necessary for all the leaves to wither for the bulb to reach complete dormancy. Keep the bulb on the dry side. Check the bulb every week; after eight to ten weeks of cool storage, you should notice the tip of the new flower stalk emerging from the bulb. If you shift the bulb to a warm spot (70-80°F) for three weeks, you will encourage leaves to emerge at the same time the flower stalk is developing, but a warm treatment is not needed for floral development. You can repot the bulb in fresh soil at this point. Be careful not to bury the bulb too deeply. At least one third of the bulb should be visible above the soil surface. Don't plant the bulb in a pot that is any more than two times the diameter of the bulb. When you repot it, you may notice smaller side bulbs that can be broken away from the main bulb. These can also be potted and grown on in a sunny spot. They will not bloom this year, but may bloom after two or three years of growth.

7. Start it warm and water tentatively.
Water your amaryllis thoroughly right after you repot it, and allow the soil surface to dry a bit before watering it again. Place it in a warm spot to stimulate root growth. A sunny spot is best. If you try to re-bloom your amaryllis in dim light conditions, the flower stalk will grow long and your amaryllis will be more prone to breakage or tipping. Wait until the first flower has opened to move the plant to a location with subdued light and cool temperatures to preserve the flower as long as possible.

8. Repeat.
You can keep your amaryllis indefinitely, and if you can provide the right conditions for growth and dormancy, your bulb will get larger and multiply itself over the years. Large bulbs may produce as many as three flower stalks and some bulbs may bloom during the summer as well as during the winter, depending on temperature and other growing conditions. 

Call us for a Holiday arrangement for your office or home or next holiday party!
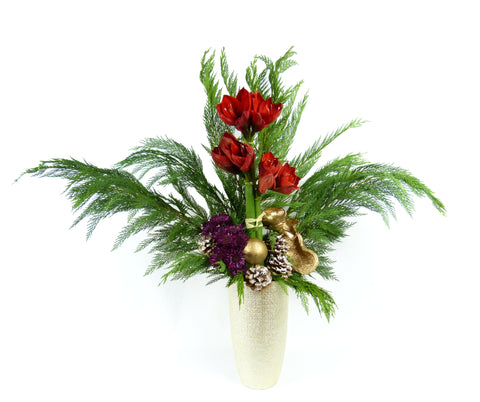
Alaric Flower Design Amaryllis Arrangement

Wednesday, November 13, 2013

2014 Wedding Flower Trends

Alaric Flower Design is seeing some exciting new trends for the 2014 wedding season. Brides, florists, event planners are getting so creative and innovative with their flower selections that there are some really exciting and fresh new trends emerging for 2014. Here are some specific trends to look out for.

The Return of Baby’s Breath
We are also seeing specific flowers becoming popular. And one has really surprised us! This once outdated flower is returning to wedding's and its looking better then ever.
Image Via
Succulents
The use of succulents has become extremely popular especially in wedding bouquets. They really add texture and wonderful shades of greens to a bouquet.


Timeless Classics
Garden Roses, Ranunculus, and Peonies are all the rage with brides to be.
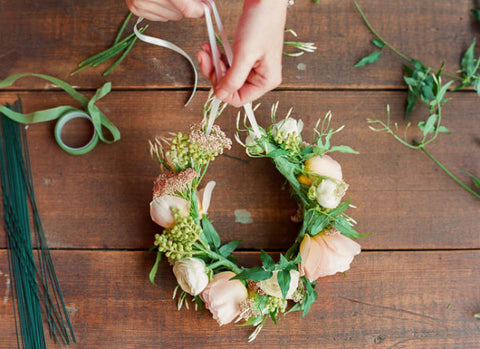
Flower Crowns
This is a major trend for brides it adds a earthy vibe to any wedding and is so versatile the possibilities are endless.


Image Via
Greenery
Today’s brides are getting more creative with their options. Long gone are the days where greenery was seen as the cheap option. Using greens such as moss, ferns, and ivy are the perfect way to bring the outdoors in.

Thursday, November 7, 2013

How to Make Cut Hydrangeas Last Longer


Image via

We love hydrangeas they bloom so beautiful and full. Working with them is another story, they often wilt easily when used in an arrangement. They have very thick wood-like stem that expels a sticky substance that often clogs the stems, preventing moisture from reaching the blooms.  Alaric Flowers is here to give you some of our tried and true techniques that work to get the maximum life out of your hydrangeas,


The Hot Water Method

1. Immediately after cutting each bloom, drop the stem in the water.
2. Boil water and pour it into a cup or any container.
3. Cut the hydrangea stems to the desired length.
4. Stand the stems of the hydrangeas in the hot water for 30 seconds.
5. Immediately put into room temperature water and then arrange.
The Alum Dip Method
1. The alum used in this method can usually be found in the spice section of the grocery store. Occasionally it is found with the pickling supplies.
2. As you arrange the blooms, re-cut the stems and dip the bottom 1/2 inch of stem into powdered alum.
3. Arrange as usual in water. 
REVIVING WILTED BLOOMS IN AN ARRANGEMENT:
1. If the water in the arrangement is more than a day old, change it for fresh water before beginning the revival process.
2. Re-cut the stems of the wilted hydrangeas by removing a portion at the bottom.
3. Use the Boiling Water Method: Boil water and pour it into a cup.
4. Stand the stems of the wilted hydrangeas in this water for 30 seconds.
5. Immediately put into room temperature water (this usually means back into the arrangement).
6. If the blooms are not too old, within a couple of hours they will have completely revived. Occasionally, the revival process will take several hours. In most cases, the blooms will look as fresh as the first day.

Image via

Dunk Method

1. Or you can dunk the entire hydrangea head into cool water 
2. Let it soak for 20-30 minutes.
3. Place the stem in fresh water
4. After 24 hours your bloom should be good as new                                                                                                                                                                           


The maintenance for hydrangeas may seem like a lengthy process but the results are way worth the efforts.
Enjoy your blooms!

Thursday, October 31, 2013

Incorporating Fruits, Vegetables, and Herbs In Your Flower Arrangements


Image via


Creating flower arrangements doesn't mean you have to stick to floral elements. Unique and bold designs can be easily put together by marrying flowers with edible fruits and vegetables. Bright colors, strong shapes and a variety of texture make edible elements especially sought after. They also can prove cost friendly, especially when paired with expensive stems of flowers.

Usually, all we see in flower vases are the stems of bouquets. However, a large clear vase can be a display case for much more. Root vegetable and fruit with hard rind are the best to display in your vases, as the continued exposure to water will not cause them to spoil fast. Fill a vase with bright yellow lemons, Or sticking freshly scrubbed carrots into a square vase, and using the protruding stems as greenery for a rose arrangement. Limes, celery and radishes all work well underwater. Cranberries submerged in a vase make for a fun and festive holiday arrangement. Make sure to change the water frequently, at least once every two days, to avoid it turning cloudy.
Image via


Tips:

1. Dip bananas, pears and apples in lemon juice to prevent discoloration.
2. Leave pomegranates and berries intact to reduce the risk of stains.
3. Support pieces of fruit or veggies like apples or whole lemons within your floral arrangement with stiff, heavy gauge flower wire.
4. You can also use bamboo or metal skewers, wrap the skewers with green floral tape to make them look like stems.
6. Keep the arrangement hydrated. You may need to mist the top to keep produce looking lively.
Squash and Pumpkin Floral Dishes

Gorgeous colored squash can be hollowed out and used as a display dish for your floral arrangements. Use a waterproof lining, to avoid getting the vegetable soggy, and some floral foam as your base. Then add the flowers so they spill out of the top. Ivy plants, or other short plants such as succulents, can also be used with this display idea.

Colorful Edible Designs for Your Flower Arrangements

Look around at the grocery store for bold color that can be used. Long red onions add a pink-purple tone to a display. Purple artichokes, cabbage, kale and grapes can be used as well. Oranges and tangerines have a hard enough rind to be kept out of the fridge and in a display.

Be careful not to eat vegetables or fruit that has been in water for long periods of time, especially when exposed to cut stems, as they may have absorbed unhealthy or poisonous sap.


                                                                             Image via

Herbs
If you pick the right herbs, like chamomile, they will hold up longer without water than colorful flowers in boutonnieres and bouquets. Others, again like basil or chives, should be avoided because they wilt quickly.
Here are a few that work well in arrangements:
Pineapple Sage- A late summer bloomer, these flowers can be used to add their bright color and subtle fruity fragrance to autumn arrangements. The bright green leaves and red flowers look great combined with purple.
Rosemary- Sprigs of rosemary create a dark green backdrop to complement showier flowers such as roses. The clean, alpine scent is invigorating.

Bee Balm- Bee balm has an exceptionally long vase life. Depending on the variety the blooms are pink, red, purple or white. Lemon bergamot, a variety of bee balm, has lemon scented leaves.

Dill-Dill's- Feathery foliage and lacy flowers are a nice alternative to baby's breath in flower arrangements.

Lavender- A few fresh sprigs of lavender placed in a small vase is really simple and very effective. It's a relaxing scent perfect for bed and bath rooms.

Adding fresh fruits, vegetables, and herbs to your flower arrangements create interesting look that will make your flowers pop by adding interesting textures and shapes. Consider food as design inspiration for your next get together or your next holiday table display.
Alaric Flower Design creates custom fruit/vegetable/herb flower arrangements call us and we can create a beautiful one of kind piece for you!
Call us at 212-308-3794


Wednesday, October 23, 2013

6 Stylish Halloween Centerpiece Ideas


We here at Alaric Flowers absolutely love Halloween. There are so many ways to get creative with flowers and decorations this time of year.
We’ve put together a must have list of 6 stylish and fun centerpiece ideas for your next Halloween bash.
1. Make sure to scrape out all the pumpkin seeds of this fun pumpkin arrangement before inserting a vase with flowers.


2. Paint a terra cotta pot or any plastic vase like candy corn, and use dried branches and flowers to create a unique fall design.


3. Use plastic insects and rubber snakes to make a sophisticated yet spooky arrangement.


4. Use a pale or a bucket and mix in fall inspired flowers with halloween accents such as plastic spiders or spiderwebs.


5. Stick your favorite flower into a vase with water and fit it into a larger vase and fill with candy corn or any halloween candy of your choice.


6. Get inspired from the Mexican holiday, the day of the dead. Paint skulls and adorn them with roses and traditional carnations of your choice. 


Need a custom Halloween or Fall theme centerpiece? Contact Alaric Flower’s to help, we can create a spooky stylish arrangement for your special event.


Thursday, October 17, 2013


Have you ever received a beautiful Alaric flower arrangement and wanted to preserve it forever? Well we have some tips that just might do the trick. Follow these handy steps to create a gift that keeps on giving!

1. The Microwave Method
Who knew cat litter could be used for something other than the litter box! You can dry flowers in minutes instead of weeks by using a microwave. Choose the flowers for drying. One at a time, place the flower in a microwavable bowl and cover with about four cups of cat litter. Microwave on high for two to three minutes. When the cat litter is cooled, remove the flower and brush off excess.

2. Silica Gel
If you want your flowers to look just like they did in your garden, trying using silica gel. The sandy-like substance can be found at craft stores and works best with sturdy flowers like zinnias or roses. Bury your blooms in a large container of silica gel. In a few days to a week, gently uncover vibrant, preserved flowers.


3. Pressing Method 

To use dry flowers for more than household decorating, use the pressed method. Take an encyclopedia or other heavy book. Line a page with parchment or wax paper and arrange flowers face down so they don't overlap. Close the book and leave untouched for about a week or more. Once all the moisture is gone and they have a papery texture, you can use them to make bookmarks, jewelry, greeting cards, or wall art.


4. Air Drying

Hanging bouquets upside down is the most traditional technique. Gather the flowers in a bunch and secure the stems with a rubber band. Hang upside down in a well-ventilated area out of direct sunlight, like from kitchen rafters or in an empty closet. Watch the petals shrink and change color, and within a few weeks you'll have beautiful dried flowers in vintage hues.


5. The Easy Way
Drying flowers in a vase is effortless. Place the stalks in a few inches of water and forget about them. Once all the water is evaporated, the flowers should be upright and perky, but dry. Hydrangeas or baby's breath are good choices for this method, as blooms with more tender stalks might droop. Simply use the vase as a table decoration or remove the flowers, tie a ribbon around the stems and hang on the wall.

Drying out your flowers arrangements is a great way to enjoy your flowers year round; they offer a unique texture and design effect to any room. It takes little effort and lands great results!


Wednesday, October 16, 2013

Trend Watch: Terrariums
Even though Fall is upon us why not hold onto a little bit of Summer with a simple and eye catching terrarium. They’ve certainly gone main-stream and can be found in homes, offices, and businesses. Modern terrariums are one of the latest trends in home décor and plant and flower decorating options.
The supplies needed to build a terrarium can be found at most garden stores—from the proper plants to the soil and pebbles as well as glass containers and domes of all sizes. Accent pieces such as orchids, drift wood, sea shells, or any other miniature decoration are also useful to add a bit of color and whimsy to your encapsulated arrangement.

      Supplies:           
      1. Small rocks or pebbles for drainage and texture                                                                                                                      
2. Small piece of charcoal (the type found in the pet supply department for aquarium filters.)
3. Potting soil.
4. Miniature house plants and mosses. Ivy, ferns, succulents, and orchids work well.   5. Sand                                                                                                             6. Driftwood or branches                                                                                     7. Glass container with no lid                                                                                     8. Spray mist bottle of water


Directions:
1. Line the bottom of a glass jar with pebbles—one inch is usually adequate.
2. Place a small piece of charcoal in the middle of the pebbles. The charcoal helps to keep the soil fresh.
3. Add a few inches of potting soil and sand to the layer of pebbles and charcoal.
4. Gently place three or four small plants into the container. Make sure the plants are nestled together but not crowded or root bound.                                                             5. Arrange live moss around the plants. The moss adds visual appeal as well as lending support and anchorage for the plants.                                                                        6. Mist the terrarium and cover.                                                                             7. Place your terrarium in an area with moderate light, making sure that the terrarium is not exposed to direct sunlight.

Maintenance:
Open the lid of the terrarium and feel the soil every week or two. If the dirt is moist to the touch and condensation is built up in the terrarium, it’s fine. If the soil feel dry, mist until dew drops appear on the leaves of the plants and on the insides of the glass.
-Contact Alaric Flower Design for custom one of kind Terrariums for your home or office!


How to Care for Your Fresh Flower Arrangements


Every day at Alaric Flowers we get calls from people wondering how best to care for their fresh flower arrangements. We have a few techniques to help keep your flowers looking fresh and beautiful.

-Fresh flowers need care and the better you care for them the longer they last.
Never leave the arrangement in direct sun, they can actually burn if you keep them too warm or near the sun.

-It is also very important to keep the water fresh and clean. We suggest that every other day you change the water in the vase. If you carefully pour the original water out of the vase and replace it with room temperature water, then there will be less bacteria growth and the flowers will stay fresh longer.

-If you are able to pull the entire bouquet out of the vase, it is not a bad idea to give the flowers a fresh cut as well. This will ensure that the flowers will stay really hydrated and keep them from starting to wilt.

-It is best to cut the flowers at an angle in order to expose a larger surface area to the water. You can sometimes give the vase a quick wash while I have the flowers out of the vase. This ensures that any bacteria that might have started to grow will be eliminated so that the flowers have a truly fresh environment. It is not necessary, however, to wash the container every time.

-All flowers have a different vase life. Some flowers, such as orchids, last a very long time when cut, while other flowers, like hydrangeas, have a shorter vase life. You can always pull out flowers as they expire and either replace them with new flowers, shift the arrangement around, or even break it up into smaller vases. By pulling out the flowers as they expire, you will be able to enjoy each and every stem in the arrangement!